Leveling Up My Homelab
For as long as I’ve worked in tech, I’ve had some kind of homelab (even if I didn’t call it that at the time). It started as a hand-me-down desktop that I used as my first Linux server in my childhood bedroom and eventually grew to a few devices stacked in a rack, some smart plugs on a VLAN, and a handful of bash scripts glued together to make things work. But over time, it started to feel more like a pile of parts than an intentional system.
This post is the beginning of a series documenting the rebuild – both as a technical reference and as a way to keep myself honest. The new setup is focused on designing and building something resilient, extensible, and useful. Something that helps me grow as an engineer, experiment freely, and run serious infrastructure on my own terms.
The Old Setup: Just Enough To Be Dangerous
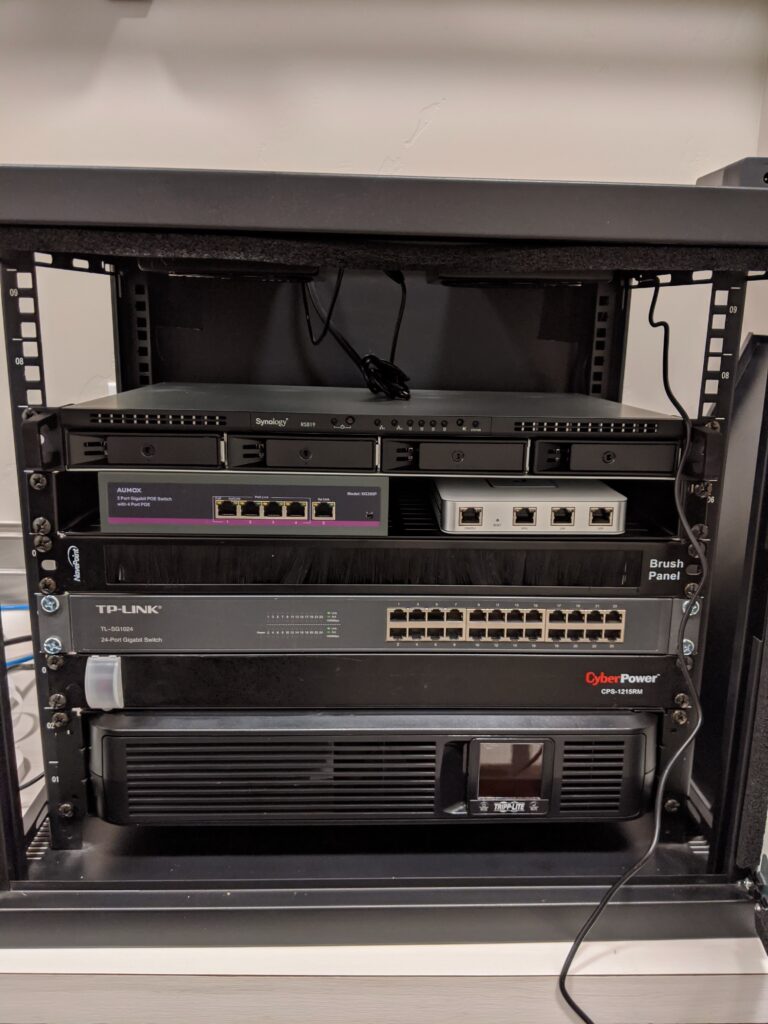
(Evidently, I never took a picture of the old rack with all of the equipment in it. This picture shows the in-progress version of it without the Mac Mini and such. I’ll be better about documenting my builds in the future!)
The most recent iteration of my homelab was small, straightforward, and (at least for a while), good enough:
- Compute
- Mac Mini (M1, 8GB RAM)
- Beelink SER3 mini PC (Ryzen 7 3750H, 16GB RAM)
- Storage
- Synology DS819 NAS
- Networking
- UniFi Dream Machine SE
- UniFi UAP AC Pro
- Power
- Tripp Lite SMART1500LCD UPS
- CyberPower CPS1215RM PDU
I bundled all of this up into a 9U Navepoint rack. It was clean and quiet. I could SSH into a box or log into a UI and just get things done. There weren’t a lot of moving parts – and that was intentional.
But as my goals grew more ambitious, the limitations started to show.
What I liked
- Compact footprint: Easy to fit in a closet, minimal cabling
- Low mental overhead: No orchestration layers, no IaC, no GitOps: just click/SSH and go.
- Manageable complexity: I always knew were things were because I’d set them up by hand.
What Held Me Back
- Synology NAS was underpowered: I couldn’t run Docker due to hardware limitations. All of the better models that supported Docker were too deep for the rack.
- Limited orchestration: I was using Laminar and some shell scripts to handle things like dynamic DNS updates or deployments to my documentation website. It worked, but it was brittle and hard to iterate on.
- Compute bottlenecks: The SER3 couldn’t keep up. It was easy to accidentally spin up too many services and I found myself either tuning resources or deciding I didn’t need some piece of software after all instead of solving the problems I wanted to solve.
- No disaster recovery: Everything was hand-configured. If something went down, I had no clean way to rebuild it.
- No local/remote access: If I changed anything (particularly on the SER3) that broke networking in any way, I had to track down a monitor and keyboard, plug it in, fix the problem, and put it away. Every time.
Ultimately, the setup didn’t support meaningful experimentation. It made me cautious about trying new things – exactly the opposite of what a homelab should do.
What I Wanted Instead
I started thinking seriously about what I wanted this environment to be (and not just what gear to buy). The answer was something that looked a lot more like production infrastructure than something a hobbyist was tinkering with.
Here’s what I was missing:
- Modern infrastructure primitives: Kubernetes, GitOps, observability, and declarative state
- Resilience: Real backup and disaster recovery for critical data (especially app state)
- Scalability: More compute and storage with minimal added complexity.
- Purpose: A space to build workflows, tools, and systems that I actually care about.
I didn’t just want more machines: I wanted a system that reflects how I think about infrastructure, and that pushes me to get better at building it.
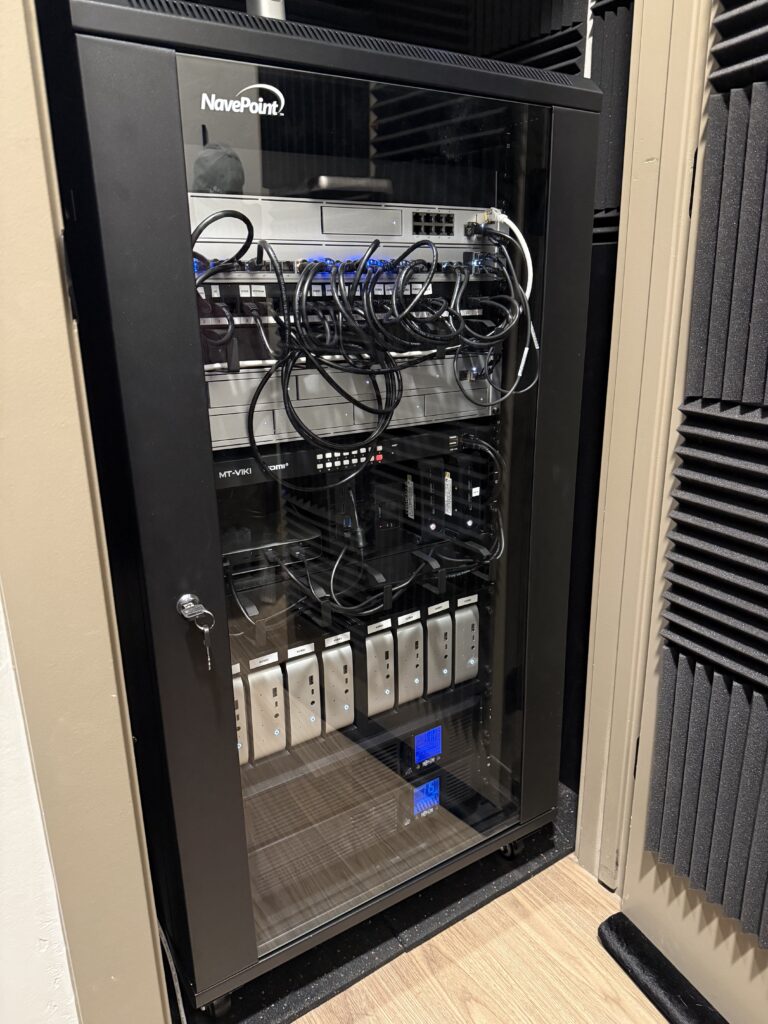
The New Stack
I’ve now replaced the old rack with a 22U setup in a sound-treated closet. It’s still quiet, but this time, it’s built to grow.
- Compute
- Control plane: Beelink SER5 MAX (Ryzen 7 6800U, 32GB RAM)
- Workers: 8x Beelink SER9 Pro (Ryzen AI 9 365, 32GB RAM, 1TB SSD, integrated Radeon 880M GPU)
- Standalone database server: Beelink SER5 MAX (Ryzen 7 6800U, 32GB RAM)
- Mac Mini Cluster (planned): 3x M4 Mac Minis with high RAM
- Storage
- UniFi UNAS PRO: (replacing the Synology NAS) 7x 8TB Seagate IronWolf
- Networking
- UniFi Dream Machine SE: I’ve been really happy with the hardware, so there’s not really any reason to change it out.
- UniFi U7 Pro
- UniFi Pro HD 24 PoE Switch
- 10G networking between UDM SE, UNAS, and switch
- Power
- Tripp Lite SMART1500LCD UPS (2x)
- CyberPower CPS1215RM PDU (2x)
- Local/remote access
- BliKVM: This allows me to remotely access a machine over the network (video is streamed and my keyboard/mouse actions are streamed back). There’s also HDMI passthrough for local access.
- MT-VIKI 16 Port KVM Switch: Because I now have so many machines in the rack, I need a way to switch between them. The output of this device is the input to the BliKVM (and passes through to a monitor)
- Adesso AKB-425UB-MRP 1U Keyboard/Trackpad Drawer: Simple and to-the-point. This was one of the few options I found that didn’t have some janky built-in KVM switch.
- Custom hardware to allow controlling the KVM switch from the BliKVM web interface (more about this in a future post)
There is significantly more equipment running in my rack now, but with all the extra hardware, I’ve gained a lot of additional capabilities. Some of the things I’m already running or plan to bring online soon:
- Kubernetes: The cluster runs on Talos Linux, which is PXE-booted for easy upgrades/recovery.
- Argo CD: All cluster state is applied via Argo CD from a self-hosted Git repository.
- Automation: n8n, Appflowy, Home Assistant
- Identity: Pocket ID (a simple OIDC provider)
- Tunneling: Cloudflare Tunnels for selected services
- AI Workloads: Running (maybe eventually training) models with GPU support in Kubernetes
- Multi-site Kubernetes: Exploring Kubespan to connect remote VPSes into the cluster.
Some of these are already in place. Some are aspirational. I’ll be posting writeups about everything I’m doing as time goes on.
Why it’s important to me
This project isn’t about chasing complexity or buying new gear. It’s about building something solid. Something that supports real work, real learning, and real reliability. It’s not always perfect or glamorous, but that’s the point: I want a system that can take a punch, adapt over time, and help me learn something in the process.
This is just the beginning. In upcoming posts, I’ll cover:
- PXE booting with custom Talos Linux images
- Automation for node provisioning
- My GitOps/ArgoCD setup
- Authentication with Pocket ID
- GPU scheduling in Kubernetes
- Disaster recovery for stateful apps
I finally have the platform I wanted. Now it’s time to build on it.